Easy Painting Ideas for Kids 2025
Disclosure: This post may contain affiliate links, meaning I may get a small commission if you decide to make a purchase through my links, at no cost to you.
Are you looking for fun and easy painting ideas for kids? Look no further! In this post, we will share some of our favorite crafts ideas that are both simple and so much fun!. These fun art projects are great ways to unleash your child’s creativity, improve fine motor skills, and it can also be a fun bonding experience. So grab some paint and let’s get started!
Art Project With Just One Paint Color
There are many easy painting ideas for kids that can help them create beautiful works of art. One fun art project is to have them choose one paint color and then paint a picture using only that color. This can be a great way to teach them about different shades and hues.
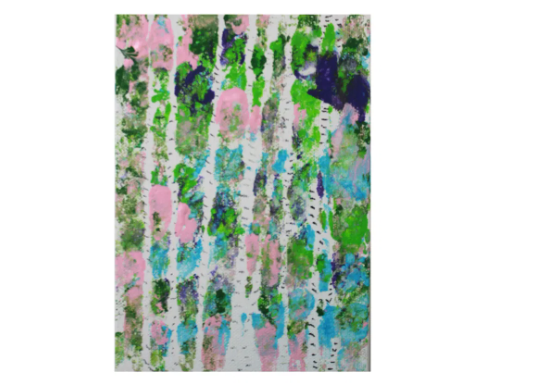
Mixing Colors – Painting Idea
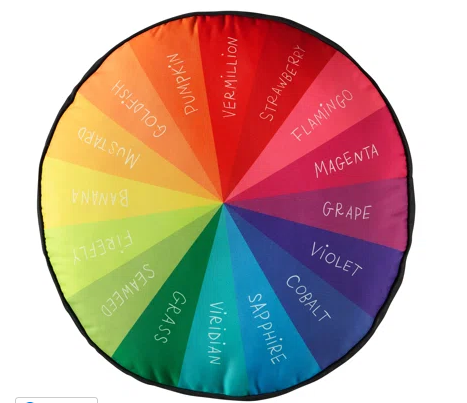
You can also use different paint colors on the color wheel, experiment with colors on the opposite side of the color wheel or contrasting paint colors. This is a great way to let them explore colors and how the work together. Mixing colors to create more colors is also a fun art activity. Of course mixing some colors with other colors don’t always turn out like we want, but its a fun art project worth trying!
Salt Painting
Salt painting is another great art project that is a fun and easy painting idea for kids! All you need is some salt, food coloring, and paper. Simply mix the salt with a few drops of food coloring to create your paint. Then let your little ones go to town painting whatever they like! The salt will add a sparkly effect to their artwork.
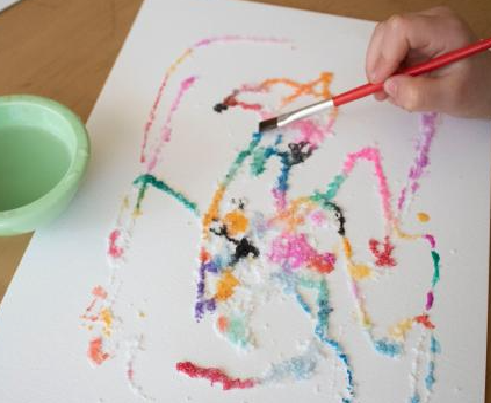
One way to create a kids painting with salt is to pour salt onto a wet paintbrush and then brush it over the paper. The salt will stick to the wet paint and create interesting patterns.
You can also sprinkle salt onto the wet paint and then blow it around with a straw to create different designs. If you want to add more dimension to your painting, you can glue salt onto the paper before you paint over it. Experiment with different colors and techniques to see what effects you can create!
Paint Pouring
Paint pouring is a fun and easy way to create colorful works of art. All you need is some paint, a few supplies, and a little bit of creativity. Here’s how to do it:
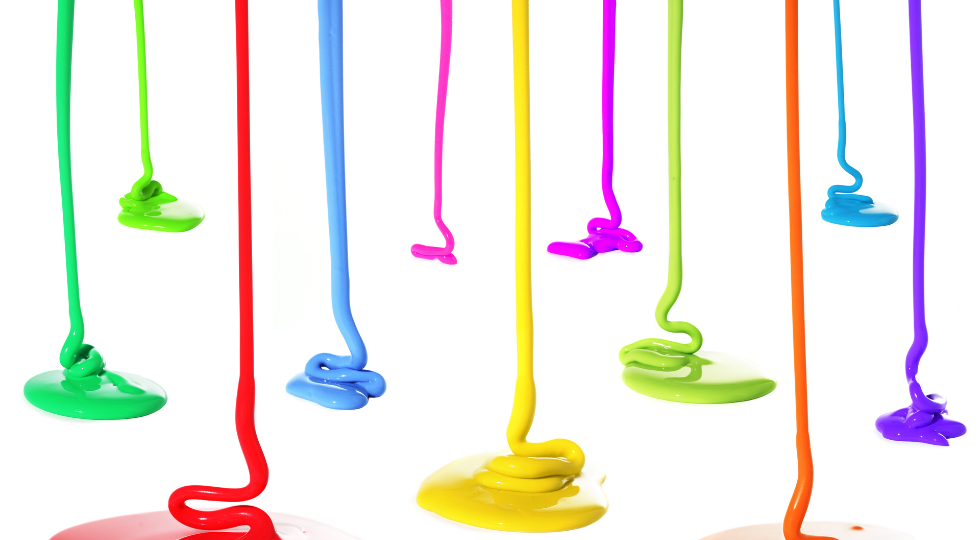
1. Pour a small amount of each color of paint into separate cups or containers. You can also pour them in the same container using layers trying not to mix the paint.
2. Place your canvas or paper on a flat surface.
3. Starting with one color, pour the paint onto the canvas or paper, tilting it if necessary to spread the paint out. If you would like, you can add more than one color at a time, but be careful not to mix the colors, otherwise it will turn into a mud color. As much as we love mud, it doesn’t make for a very pretty picture.
4. Repeat with the other colors, pouring them next to or over each other until you’re happy with the results.
5. Allow the paint to dry completely before framing or displaying your work of art.
Black Glue
When it comes to creating stunning artwork, there are few things as versatile as black glue. By mixing black glue with watercolors, you can create a variety of different effects that will add interest and depth to your paintings.
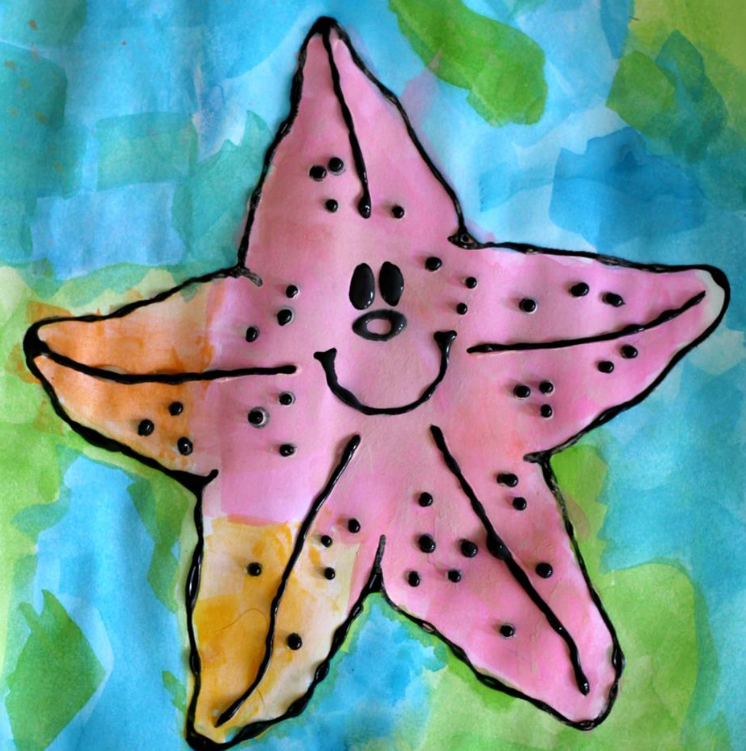
One of the most basic ways to use black glue is to outline your subject matter before filling it in with color. This will give your painting a defined look and make it pop against the background.
If you want to add texture to your painting, you can mix black glue with watercolors to create a paste. This paste can be used to add dimension to your painting by creating raised areas or even carving out shapes.
For a more subtle effect, you can mix black glue with watercolors to create a tint. This will add a hint of color to your painting without making it too busy or overpowering.
Whatever effect you’re going for, mixing black glue with watercolors is a great way to achieve it. So experiment and have fun creating beautiful artwork that’s unique to you.
Painting with Household Items
Most people don’t think that using simple items at home as fun ideas for a craft project, but give some of these painting activities a try. With a little bit of creativity and imagination, anyone can turn q tips, cotton balls, masking tape, aluminum foil, paper towels, bubble wrap, and even coffee filters into works of art.
One of the great things about painting with everyday objects is that it’s very low-cost. All you need is some paint and a few common household items, and you’re good to go. Plus, it’s a great way to get creative with the kids or have some fun yourself.
Here are a few ideas for painting with common household items:
– Use cotton swabs dipped in paint to create polka dots or other patterns on a piece of paper.
– Dab a coffee filter in paint and then stamp it onto a piece of construction paper to create a unique background or design.
– Cut out shapes from paper towels and use them as stamps. You can also crumple them up and dip them in paint to create interesting textures.
– Use a fork or other utensil to make marks in the paint. This is great for creating grass, trees, or other landscape features.
With a little bit of creativity, you can turn any household item into a painting tool. So get creative and have fun!
Spinning Art
There are few things more fun for kids than watching paint spin around using a power drill to create a work of art. And with a little help from an adult, making spin art is a snap! Just follow these simple steps:
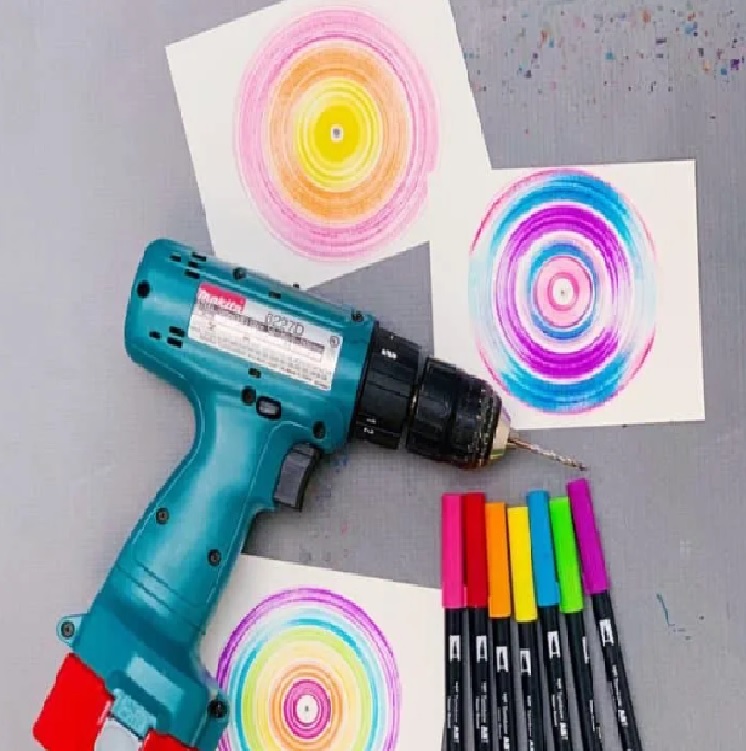
1. Gather your supplies. You will need some poster paint, a power drill with a small drill bit. (you can find these at any hardware store), and some paper.
2. Pour a small amount of paint into each section of the paper.
3. Attach the paper to the drill bit. Turn on the drill and watch the paint spin!
4. Hold your paper up to the spinning paint and watch as it creates a work of art.
5. Let the paint dry and enjoy your creation!
Shaving Cream
When it comes to creating art, there are a variety of different mediums that can be used. One medium that can be both fun and effective is shaving cream. Using shaving cream to create art is a great way to add texture and dimension to your work. Plus, it’s a medium that is easily accessible and relatively inexpensive. What a fun sensory experience!
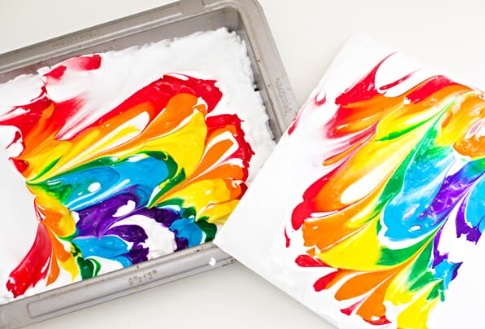
Here are a few tips on making a fun painting activity using shaving cream:
1. Prepare your work surface. When using shaving cream, it’s important to protect your work surface. Cover your surface with plastic wrap or parchment paper to prevent the shaving cream from damaging it.
2. Choose your colors. You can use a variety of different colors when creating art with shaving cream. Food coloring is a great way to add color to the shaving cream. Simply add a few drops of food coloring to the shaving cream and mix it until you get the desired hue.
3. Start painting. Once your work surface is prepared and you have your colors mixed, you’re ready to start painting. Use a brush or your fingers to apply the shaving cream to the surface. You can create a variety of different designs and patterns.
4. Let it dry. Once you’re finished painting, let the shaving cream art dry. This may take a few hours. Once it’s dry
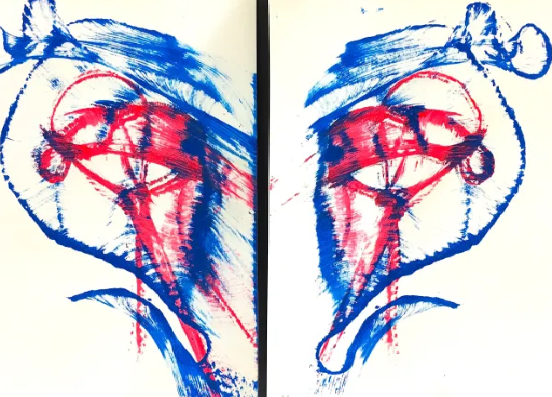
Symmetrical Art
Another great painting idea is creating symmetrical art. This is a fun and easy way to create beautiful works of art. It can also be a great way to learn about balance and proportion. Here are some tips on how to create symmetrical art:

1. Find a subject that is naturally symmetrical. This could be a flower, a face, or even a building.
2. Fold your paper in half. This will be your baseline.
3. Begin drawing your subject on one side of the fold of the paper. Use thick strokes to create one half of the picture.
4. Once you have finished painting your subject, fold the paper in half. Your subject will form to the other side to create a symmetrical picture.
5. Stand back and admire your finishedetrical work of art!
Wrapped Yarn
Kids love creating fun painting ideas with yarn, especially older kids, because you never know how it is going to turn out. Here is another fun painting idea on how to create fun art activities using wrapped yarn:
1. Choose any color of yarn. The thicker the yarn, the better your picture will be.
2. Wrap yarn around the canvas spacing out the yarn as you want.
3. Paint over the yarn with acrylic paints, creating different patterns and designs. Use lots of bright colors. The colors could be contrasting colors, or different hues of the same color. Use your imagination.
4. Allow the paint to dry and then pull off the yard carefully. See what fun picture you have created!
Yarn Pulling
Acrylic paint is a versatile medium that can be used for a variety of painting projects. One fun way to use acrylic paint is to create a “yarn painting.” This type of painting is created by pulling yarn through wet paint to create interesting patterns and designs.
Yarn paintings are a great way to add texture and interest to a painting. They can be used to create abstract designs or to add a unique touch to a representational painting. Yarn paintings are also relatively easy to create, making them a great project for both beginner and experienced painters alike.
To create a yarn painting, you will need:
–Acrylic paint or craft paint
-Yarn
-A paintbrush
-A surface to paint on (canvas, wood, etc.)
Start by painting your surface with a base layer of acrylic paint or craft paint. You can use any color or colors you like. Once the base layer is dry, begin adding your yarn designs.
To do this, dip the end of your yarn in the paint and then carefully pull it through the wet paint, creating whatever design you like. You can make simple lines or more complex patterns. Experiment and have fun!
Once you are happy with your design, allow the painting to dry completely. Your yarn painting is now finished and ready to display!
The Magic of Alcohol and Acrylic Paint.
In this tutorial, we’ll be creating a beautiful painting using alcohol and many different colors of acrylic paint as well as black acrylic paint.
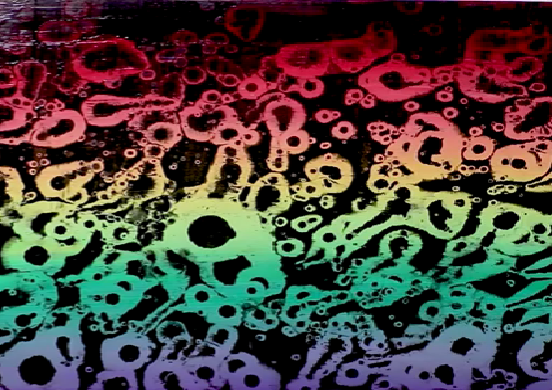
First, you’ll need to gather your supplies. For this project, you’ll need a canvas, rainbow colors of acrylic paint and black acrylic paint, alcohol, and a brush. Once you have all of your supplies, you’re ready to begin!
To start, paint the canvas in a colorful design using many different colors and patterns. Wait for the paint to dry completely.
Then paint a layer of black acrylic paint onto your canvas. Without letting the black paint dry, quickly dip your brush in the alcohol. Let the alcohol drip onto the black acrylic paint and watch the magic happen. Splatter painting with the alcohol to reveal the colors underneath the black acrylic paint. It is magical.
Blow With A Straw Art
How to create art by blowing paint with a straw
Creating art can be as simple or as complicated as you make it. Some people spend years perfecting their technique, while others just have fun and experiment. If you’re looking for a fun and easy way to create art, why not try blowing paint with a straw?
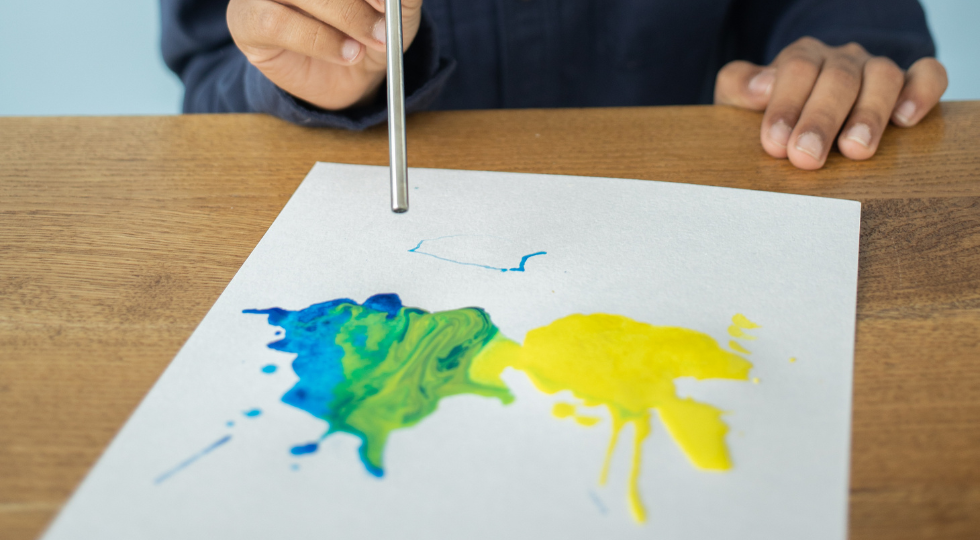
This technique is great for kids and adults alike. It’s a fun way to experiment with color and create unique pieces of art. Plus, it’s super easy to do! Just follow these simple steps and you’ll be creating beautiful works of art in no time.
1. Begin by gathering your supplies. You’ll need some straws, paint, and paper. You can use any type of paint you like, but we recommend using acrylic or tempera paint for best results.
2. Pour your paint into a cup or bowl. Then, dip a straw into the paint and blow it onto your paper.
3. Experiment with different colors and techniques. Try mixing colors together or blowing the paint in different directions.
4. Once you’re happy with your artwork, let it dry completely before framing or displaying it.
That’s all there is to it! This simple technique is a great way to create beautiful works of art. So grab some supplies and start blowing paint today!
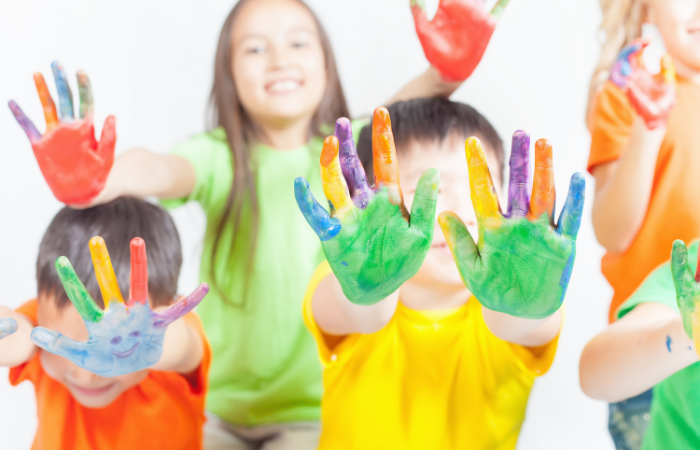
Finger/Body Painting
Finger painting is a great way to get creative with your kids! All you need is some finger paints and some paper, and you can let your little ones loose to create their own masterpieces.
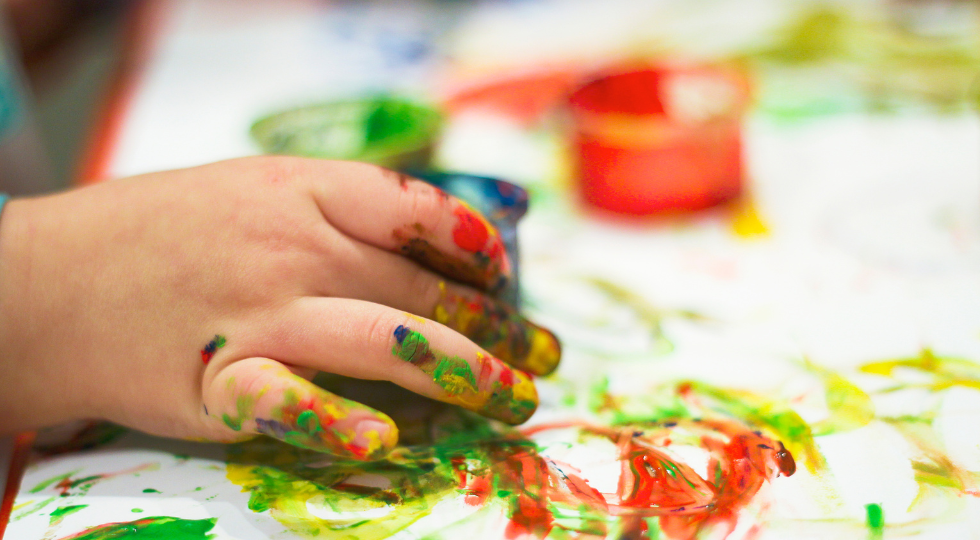
Here are a few tips on how to get the most out of finger painting with your kids:
1. Use washable finger paints. This way, if your kids happen to get paint on themselves (or the walls!), it will come right off.
2. Put down some newspaper or a drop cloth to protect your surfaces from any stray paint.
3. Set out a few different colors of finger paints, and encourage your kids to mix and match to create new colors.
4. Help your kids to get started by drawing a few simple shapes or patterns on their paper with your own fingers. Then they can paint over these, or around them, to create their own unique designs.
5. Encourage your kids to use their whole bodies to paint! They can use their hands, their feet, their tummies – anything goes!
6. Once they’re done, hang their paintings up to dry and admire their handiwork!
We hope you have so much fun with these art projects. It is fun painting using different household items. It is fun making art projects to create holiday décor, and home decorations like painted flower pots.
These fun painting ideas are only limited to your imagination. Try using different kinds of paint like edible paint, liquid paint, bath paints, oil pastels, and black glue for more painting ideas.